This week Google released ARCore, their answer to Apple’s recently published Augmented Reality framework ARKit. This is an exciting opportunity for mobile developers to enter the world of Augmented Reality, Mixed Reality, Holographic Games, … whichever buzzword you prefer.
To get to know the AR framework I wanted to test how easy it would be to combine it with another awesome Android framework: Google VR, used for their Daydream and Cardboard platform. Specifically, its Spatial Audio API. And despite never having used one of those two libraries, combining them is astonishingly simple.
The results:
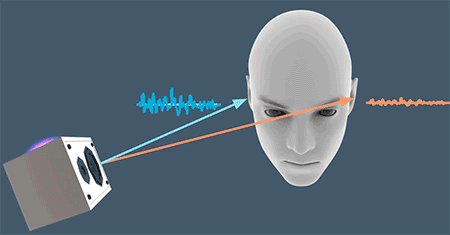
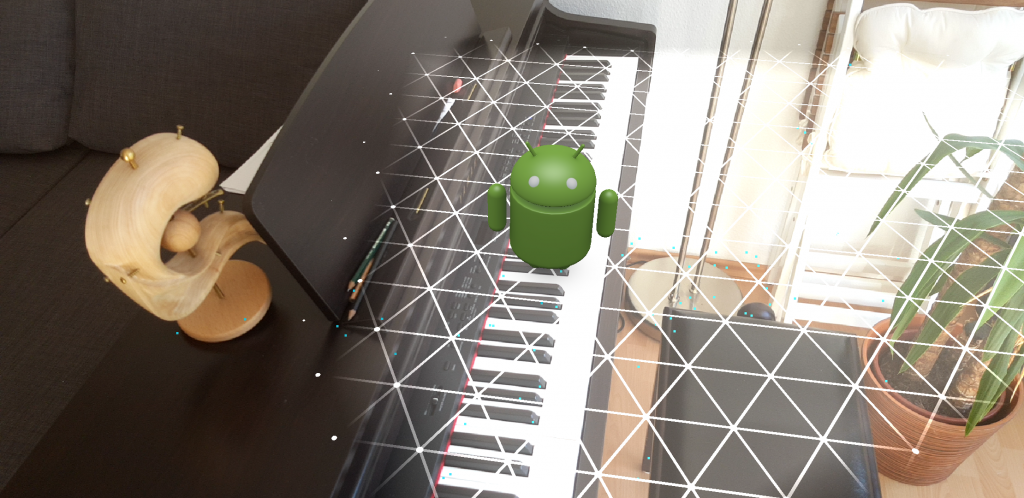
The goal is to add correctly rendered three dimensional sound to an augmented reality application. For a demonstrator, we pin an audio source to each of the little Androids placed in the scene.
Well, screenshots don’t make sense to demonstrate audio but without them this post looks so lifeless 🙂 Unfortunately, I could not manage to do a screen recording which includes the audio feed.
The how-to:
- Setup ARCore as explained in the documentation. Currently, only Google Pixel and the Samsung Galaxy S8 are supported so you need one of those to test it out. The device coverage will increase in the future
- The following step-by-step tutorial starts at the sample project located in
/samples/java_arcore_hello_arit is based on the current Github repository’s HEAD - Open the application’s Gradle build file at
/samples/java_arcore_hello_ar/app/build.gradleand add the VR library to the dependenciesdependencies { ... compile 'com.google.vr:sdk-audio:1.10.0' } - Place a sound file in the asset folder. I had some troubles getting it to work until I found out that it has to be a 32-bit float mono wav file. I used Audacity for the conversion:
- Open your Audio file in Audacity
- Click Tracks -> Stereo Track to Mono
- Click File -> Export. Select “Other uncompressed files” as type, Click Options and select “WAV” as Header and “Signed 32 bit PCM” as encoding
I used “Sam’s Song” from the Ubuntu Touch Sound Package and you can download the correctly converted file here.
- We have to apply three modifications to the sample’s HelloArActivity.java: (1) bind the GvrAudioEngine to the Activity’s lifecycle, (2) add a sound object for every object placed into the scene and (3) Continuously update audio object positions and listener position. You find the relevant sections below.
public class HelloArActivity extends AppCompatActivity implements GLSurfaceView.Renderer { /* ... */ private GvrAudioEngine mGvrAudioEngine; private ArrayList<Integer> mSounds = new ArrayList<>(); final String SOUND_FILE = "sams_song.wav"; @Override protected void onCreate(Bundle savedInstanceState) { /* ... */ mGvrAudioEngine = new GvrAudioEngine(this, GvrAudioEngine.RenderingMode.BINAURAL_HIGH_QUALITY); new Thread( new Runnable() { @Override public void run() { // Prepare the audio file and set the room configuration to an office-like setting // Cf. https://developers.google.com/vr/android/reference/com/google/vr/sdk/audio/GvrAudioEngine mGvrAudioEngine.preloadSoundFile(SOUND_FILE); mGvrAudioEngine.setRoomProperties(15, 15, 15, PLASTER_SMOOTH, PLASTER_SMOOTH, CURTAIN_HEAVY); } }) .start(); } @Override protected void onResume() { /* ... */ mGvrAudioEngine.resume(); } @Override public void onPause() { /* ... */ mGvrAudioEngine.pause(); } @Override public void onDrawFrame(GL10 gl) { // Clear screen to notify driver it should not load any pixels from previous frame. GLES20.glClear(GLES20.GL_COLOR_BUFFER_BIT | GLES20.GL_DEPTH_BUFFER_BIT); try { // Obtain the current frame from ARSession. When the configuration is set to // UpdateMode.BLOCKING (it is by default), this will throttle the rendering to the // camera framerate. Frame frame = mSession.update(); // Handle taps. Handling only one tap per frame, as taps are usually low frequency // compared to frame rate. MotionEvent tap = mQueuedSingleTaps.poll(); if (tap != null && frame.getTrackingState() == TrackingState.TRACKING) { for (HitResult hit : frame.hitTest(tap)) { // Check if any plane was hit, and if it was hit inside the plane polygon. if (hit instanceof PlaneHitResult && ((PlaneHitResult) hit).isHitInPolygon()) { /* ... */ int soundId = mGvrAudioEngine.createSoundObject(SOUND_FILE); float[] translation = new float[3]; hit.getHitPose().getTranslation(translation, 0); mGvrAudioEngine.setSoundObjectPosition(soundId, translation[0], translation[1], translation[2]); mGvrAudioEngine.playSound(soundId, true /* looped playback */); // Set a logarithmic rolloffm model and mute after four meters to limit audio chaos mGvrAudioEngine.setSoundObjectDistanceRolloffModel(soundId, GvrAudioEngine.DistanceRolloffModel.LOGARITHMIC, 0, 4); mSounds.add(soundId); // Hits are sorted by depth. Consider only closest hit on a plane. break; } } } /* ... */ // Visualize planes. mPlaneRenderer.drawPlanes(mSession.getAllPlanes(), frame.getPose(), projmtx); // Visualize anchors created by touch. float scaleFactor = 1.0f; for (int i=0; i < mTouches.size(); i++) { PlaneAttachment planeAttachment = mTouches.get(i); if (!planeAttachment.isTracking()) { continue; } // Get the current combined pose of an Anchor and Plane in world space. The Anchor // and Plane poses are updated during calls to session.update() as ARCore refines // its estimate of the world. planeAttachment.getPose().toMatrix(mAnchorMatrix, 0); // Update and draw the model and its shadow. mVirtualObject.updateModelMatrix(mAnchorMatrix, scaleFactor); mVirtualObjectShadow.updateModelMatrix(mAnchorMatrix, scaleFactor); mVirtualObject.draw(viewmtx, projmtx, lightIntensity); mVirtualObjectShadow.draw(viewmtx, projmtx, lightIntensity); // Update the audio source position since the anchor might have been refined float[] translation = new float[3]; planeAttachment.getPose().getTranslation(translation, 0); mGvrAudioEngine.setSoundObjectPosition(mSounds.get(i), translation[0], translation[1], translation[2]); } /* * Update the listener's position in the audio world */ // Extract positional data float[] translation = new float[3]; frame.getPose().getTranslation(translation, 0); float[] rotation = new float[4]; frame.getPose().getRotationQuaternion(rotation, 0); // Update audio engine mGvrAudioEngine.setHeadPosition(translation[0], translation[1], translation[2]); mGvrAudioEngine.setHeadRotation(rotation[0], rotation[1], rotation[2], rotation[3]); mGvrAudioEngine.update(); } catch (Throwable t) { // Avoid crashing the application due to unhandled exceptions. Log.e(TAG, "Exception on the OpenGL thread", t); } } /* ... */ } - That’s it! Now, every Android placed into the scene also plays back audio.

Some findings:
- Setting up ADB via WiFi is really helpful as you will walk around a lot and don’t want to reconnect USB every time.
- Placing the Androids too close to each other will produce a really annoying sound chaos. You can modify the rolloff model to reduce this (cf. line 71 in the code excerpt above).
- It matters how you hold your phone (portrait with the current code), because ARCore measures the physical orientation of the device but the audio coordinate system is (not yet) rotated accordingly. If you want to use landscape mode, it is sufficient to set the Activity in the manifest to
android:screenOrientation="landscape" - Ask questions tagged with the official arcore tag on Stack Overflow, the Google developers are reading them!